How to Properly Maintain your Landscape at the end of the winter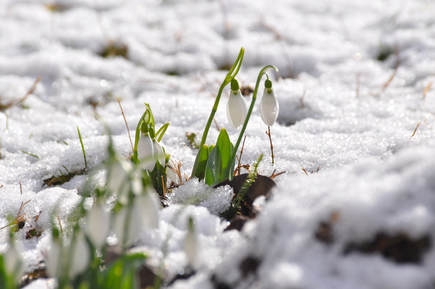 The groundhog may have predicted six more weeks of winter, but around here, we are thinking Spring! It’s important to remember that your flower beds and landscaping need maintenance in the late winter to ensure they thrive come springtime. We have put together a list of helpful tips to get you started. Get a Head Start on Pruning Depending on the level of snow cover in your area, February would be a good time to start pruning trees & shrubs. Fruit trees, in particular, will thrive in the spring when dead wood and suckers are removed before they begin to bud. Be sure to pick up any loose branches that may have fallen or been removed. These can be used later in the season as plant supports for vegetable gardens! Assess Window boxes and Plant Pots Many homeowners accent their homes with window boxes full of lush flowers. February is the perfect time to check window boxes for any areas that may need repair. Be sure to check the brackets for rust or other issues, as well. Those who enjoy displaying flowers and small shrubs in pots or urns should check their vessels for cracks. Plan Ahead Start to plan your landscape design now, to avoid scrambling at the last moment. Try to map out where to place certain shrubs & flowers, keeping in mind how much space they will take up when mature. Many plant nurseries will start taking orders this time of year, so customers can be sure they will be able to get just the plants, trees, and shrubs that they desire. Consider ordering early to avoid the hassle of having to find a last-minute substitution. Mulch in March Weather permitting, mulching in March is a great way to help ensure that your landscaping is ready for spring. Adding natural fertilizer, such as rich, dark compost or manure, can help add nutrients to ensure that your shrubs and trees will thrive. Mulching also helps prevent weeds, which will save you time and energy down the road. Contact a Lawn Care & Landscape Maintenance Specialist For those who might be a little less hands-on, February is a great time to contact a landscaping company. Whether you’re looking for someone to design a beautiful new landscaping theme or maintain what you have currently, the team at Growing Solutions, LLC can help you achieve the perfect landscape to complement your home and fit your budget. Please give us a call for more information! Learn more about how to properly maintain your landscape
0 Comments
A Comprehensive Guide to Planting the DaylilyTime to divide: After the plant has been in the ground 4 to 5 years flowering will diminish if they are not divided. Best times are either early spring, when they leaves first emerge or shortly after they have finished blooming.
Foliage – If dividing after blooming, cut the foliage down by half. Removal –Using a shovel, loosen the soil by wiggling the shovel side- to- side while circling the plant about 6” from the outer edge of the plant. Once you have circled the plant completely use the shovel to dig a little deeper. Observe and feel for the tuberous roots of the plant, do your best not to cut through them as you dig. Gently pry the plant out of the ground. Division – Put the dug up daylily on the lawn area or a tarp. For plants in the ground only 3-4 years use your hands and a hori knife, to separate the tuberous roots. If the plant has been in the ground for a longer period using two pitch forks split the plant will result in less damage to the roots. Split the plants into pieces with 4 to 5 fans of foliage. Re-Planting – Now is the time to improve that soil! Clean the hole you dug the daylily up from, remove any broken roots, leaf litter and stones. Add compost. Re-plant your daylily. Take note of the base of the foliage, it will show you how deep to plant. The lighter green at the base of the stem should be just under the soil surface. Transplanting – Now is the time to spread your daylily around your garden or pot it up as a gift for a fellow gardener. FOR ALL DIVISIONS – do this for all plants you divide Mulch – Don’t forget to mulch the area of soil you disturbed – weeds will seize the opportunity to get a foot hold. Water – As soon as you have finished mulching. Remember, these are not water lilies so don’t flood the hole. Add a little water, wait a few minutes, water again. Then… water at least once a week, more often in nature isn’t providing. Hosta Time to divide: After the plant has been in the ground 3 to 4 years. Best times are either early spring, when the leaves first emerge, or shortly after they have finished blooming. August is the best time of year to divide as the plants have finished flowering and are beginning to store nutrients in their roots. Plants put most of their energy to building roots during the fall. Foliage – can be tied up on large hostas to get it out of the way of the dividing shovel. Removal –Using a shovel, loosen the soil by wiggling the shovel side- to- side while circling the plant about 6” from the outer edge of the plant. Once you have circled the plant completely, use the shovel to dig a little deeper. Observe and feel for the roots of the plant, do your best not to cut through them as you dig. Don’t worry if you cut the edges of the roots a little, hostas are resilient. Gently pry the plant out of the ground. Division – Once out of the ground, shake the soil off the roots, with large hostas, rolling them around to loosen the soil from the roots can work well. If the plant has been in the ground only 3 to 4 years you can more easily separate the plants by using your fingers to pull them apart. If it has been in the ground for many years a tool such as a Hori knife may be need to separate the plants. With a Hori knife you want to cut the crown of the plant in ½ then make additional cuts to divide the plant into smaller pieces. Each division should have a minimum of 3 to 4 leaves. You need not break up the plant into many small divisions, you can simply cut your large hosta in ½ and re-plant it, discarding the un-wanted second half. If you want to increase the number of hostas in your garden, then divide it into small piece and plant them out. Re-Planting – Now is the time to improve that soil! Clean the hole you dug the hosta up from, remove any broken roots, leaf litter and stones. Add compost. Re-plant your hosta. Take note of the base of the foliage, it will show you how deep to plant. The lighter green at the base of the stem should be just under the soil surface. Transplanting – Spread your Hosta around your garden or pot it up as a gift for a fellow gardener. Hosta’s come in many sizes, make sure to leave enough room for your new transplants. Don’t over crowd. Brown-Eye Susan’s (Rudbeckia) or other cone flowers such as Echinacea Time to divide: Many Rudbeckia and Echinacea plants spread to cover an area larger than the gardener had originally intended. These plants do not die out in the center as grasses and iris do, so dividing is really a process of reducing the amount of the plant. After the plant has been in the ground 3 to 4 years there is usually more plants then you wanted. Best times are either early spring, when the leaves first emerge, or shortly after they have finished blooming. Foliage – Can be tied up to get it out of the way of the dividing shovel. If dividing after they have finished blooming, cut the foliage down by half to get it out of way. Removal – You do not need to remove the whole plant from the ground. Simply identify the area where you want to remove the plants. Using a shovel push the stems and leave aside, then simply cut into the base of the plant and separate the division from the mother plant. Division – Once out of the ground, there is no need to remove the soil from the roots. Each division should have a minimum of 3 to 4 stems. Re-Planting – Now is the time to improve that soil! Clean the hole you dug the plant up from, remove any broken roots, leaf litter and stones. Add compost. Re-plant your brown eyed Susan’s. Take note of the base of the foliage, it will show you how deep to plant. The lighter green at the base of the stem should be just under the soil surface. Transplanting – Now is the time to spread your plants around your garden or pot it up as a gift for a fellow gardener. Plant the divisions 18” to 2’ away from each other and other plants. Grasses Time to Divide There are three general types of ornamental grasses common in the Connecticut garden:
Common warm season grasses:
Cool season grasses bloom early, and frost does not ruin the flowers. Many have flowers/seed heads that hang around through the winter. Here is a list of cool season grasses:
Evergreen grasses
When a grass opens in the center it is time to divide. Foliage – Can be tied up to get it out of the way of the dividing shovel. Removal –Using a shovel, loosen the soil by wiggling the shovel side- to- side while circling the plant about 8”-10” from the outer edge of the plant. Once you have circled the plant completely, use the shovel to dig a deeper. Observe and feel for the roots of the plant, do your best not to cut through them as you dig. With large grasses you may need to dig a trench around the plant in order to loosen the soil and roots. Pry the plant out of the ground. Smaller grasses can come out of the ground easily. Large grasses can require iron bars or iron pikes to pry the roots up. Division– Once out of the ground, use a very sharp shovel or an axe (for large grasses), cut out the dead center and discard. Cut the remaining clump up into smaller sections, a minimum clump size is about 6” across. Re-Planting – Now is the time to improve that soil! Clean the hole you dug the plant up from, remove any broken roots, leaf litter and stones. Add compost. Re-plant. Take note of the base of the foliage, it will show you how deep to plant. The lighter green at the base of the stem should be just under the soil surface. Transplanting – Now is the time to spread your plants around your garden or pot it up as a gift for a fellow gardener. Plant the divisions far enough away from each other and other plants so as not to over crowd. How far apart, depends on the size of the grass. Contact Growing Solutions for Help with your Planting Learn more about Re-Planting A Guide to Planting Roses Correctly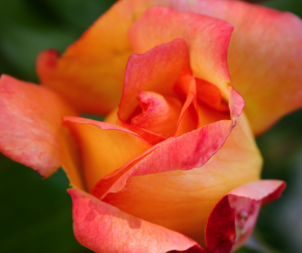 New easy care roses, beautiful, repeat blooming and fragrant – climbers, shrubs and ground covers are the essence of the June garden. Prior 2000, many landscape designers and home owners had stopped planting roses. They were “too much work”, “the leaves turn black and fall off”, “too many chemicals needed to make them beautiful”. The old fashioned roses needed too much care. In 2000 along came a game changer, the ‘Knock-Out Rose’® a shrub rose, with many fragrant blooms and disease resistant foliage. The foliage looks healthy and glossy throughout the growing season. The flowers do not require dead heading, although they are more attractive if deadheaded. They have resistance to the common diseases of the old fashioned roses. Meaning they do not require the use of toxic fungicides to keep healthy and look beautiful. The ‘Knock-Out Rose’® re-blooms throughout the summer, fall and into winter. It starts blooming in mid-May and flowers strongly through late June. They take a summer holiday and begin blooming again in mid-August, where they again bloom for 5 to 6 weeks. Most gardeners would be thrilled with a plant that blooms for 10 to 12 weeks. But, they are not finished, the show isn’t over, resting through October, they often begin blooming again in mid-November where they can bloom until late December. I’ve deadheaded mine the day before Christmas as I didn’t want pink flowers next to my holly and red berries. Thorns, all roses have them, but the ‘Knock-Out Rose’® has fewer and they are large, so easily avoidable and they are less sharp than the thorns of other roses. What about color? I should have planted the ‘Knock-Out Rose’® a red rose with a full rose flower instead of the equally lovely ‘Pink Knock-Out Rose’® as they would look great next to my red holly berries in December. ‘Blushing Knock-Out Rose’® is pink with an open flower, ‘Pink double Knock-Out Rose’® is pink with a full rose flower, ‘Rainbow Knock-Out Rose’® is multi-colored with a yellow center and pink flowers, ‘Sunny Knock-Out Rose’® is the newest introduction a yellow rose shrub. Size, these are not small plants, these roses grow 3’ to 4’ high, and 3’ to 4’ wide. They have full foliage from the base of the plant and at the top surrounding the roses with lovely foliage. What about an easy care climbing rose? Last night, when closing a second story window I was delighted by the fragrance of our climbing rose ‘New Dawn’ drifting in on the night air. ‘New Dawn’ like the ‘Knock-Out Rose’® series is very disease resistant. When I plant these at clients homes I first construct a strong trellis or arbor as this is a big climber with strong stems. It grows to 12’ high or higher and 8’ to 10’ wide. It is a repeat bloom, blooming from mid- May through early July and again in September. The flowers are a delicate pink with a good rose fragrance. No room for such large roses in your garden? You will love the ‘Drift Rose’®, growing to only 18” high and 2’-3’ feet wide, these roses find a home in even the smallest of gardens. These are in the same family as the ‘Knock-Out Rose’® series and re-bloom with the same frequency. At clients’ homes I often plant these along front walkways or at the edges of larger planting beds. ‘Drift Rose’® comes in several colors, apricot, coral, peach, pink and red. Sun, all roses need full sun. In our front garden the ‘Knock-Out Rose’® have nearly full sun with dappled shade in the late afternoon. These roses are lovely, but to see what these roses can really look like see our roses in the back gardens, they have full sun, with southern and western exposure. Insects, all roses are food for the Japanese and Asiatic beetles, the most common pest of roses. The beetles appear at the beginning of July, and eat the rose foliage leaving large holes, in years of heavy infestation they can leave a rose nearly defoliated. Check roses beginning at the end of June and remove the beetles every day, the beetles are only around for about two weeks. To remove the beetles, pick them off and put them into a jar that you have filled with kitchen dish detergent and water. They drown in the soapy water and you have protected the beauty of your roses. Deer, they do eat the rose flowers, but not usually the foliage. In areas of very heavy deer browse problems the roses must be protected. The climbing rose is often a good choice as the deer only eat the lower branches. You will have roses at the tops of the climbers where the deer can’t reach. I’ve planted all of these roses in areas of moderate deer browse without protection and have found the deer are actually ‘dead heading’ the roses for us, while leaving us many blooms to enjoy. Fertilizer, roses need to be fertilized. My fertilizer schedule for roses starts in mid-March, I apply a ½ cup of Epsom salts, the kind you buy at the drugstore for soaking sore muscles. Sprinkle the ½ cup of Epsom salts on the soil surrounding the base of the rose plant. The Epsom salts contains magnesium sulfate. Both magnesium and sulfur are important nutrients for plants and roses especially respond to it. In mid-April I apply a rose fertilizer such as Espoma ‘Rose-Tone’, I apply it again in early July. Rose1Roses purchased in plastic pots can be planted in spring through the early fall. Planting them now and watering well through the summer will give you a reason to love roses next June. Read more on How to Plant Roses Right Add Color to Your Landscape Easily without spending extra time maintaining your landGreen on green landscapes can mean lower maintenance requirements than a garden full of colorful flowering plants. But who wants an all green garden? Our landscape designers at Growing Solutions, LLC can create a colorful and low maintenance garden for your Connecticut landscape with easy care, colorful foliage plants.
This property had mostly green leaved plants with little interest. Keep in shape with easy care, colorful foliage plants. Even the Japanese red maple tree was lost in a sea of green plants. Our landscape designers brighten the landscape by adding plants with strong foliage color, leaf texture and strong shapes turned a dull green landscape into a garden with constant interest. While maintaining the clients need for low maintenance requirements. Adding trees with strong foliage color throughout the landscape adds color to the garden from April to November. Fall is an excellent time to plant trees for foliage color next spring. Learn how to add color to your landscape Masonry Projects with Natural Stones in Ridgefield and Westport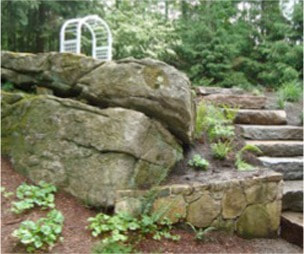 Ridgefield, is well named – it is a field of Ridges. With roads tellingly named Ledges, Limestone and Stonecrest. Wilton and Newtown road names also tell us what to expect when we start out to garden, Key Rock Road and Granite Drive should give all gardeners pause. What to do with all this rock? Plenty. Consider it a gift. Stepping stone paths, stone walls, natural patios, decking for the pool are just the start. Harvesting the rock from your land should be done with great care. If the rocks are sitting on the surface and ‘man moveable’, then have at it. Relocating and re-purposing these rocks can add great beauty and function to your landscape and gardens. Rock ledge removal and repurposing requires professional help and often a permit from your town. A few things to be careful about, before digging anywhere on your property, (especially if you have hired help or rented an excavator), you must Call Before You Dig. This is a free service provided by our local utilities, a technician will come to your house and mark the ground with spray paint to indicate where underground utility lines run so you can steer clear of them when digging. The phone number for Call Before You Dig is 1 (800) 922-4455. You will also need to know where the water, septic, drainage and irrigation lines are on your property as well. And, don’t forget the underground dog fence! Historic fieldstone walls are protected by the law and cannot be dismantled and repurposed. There are plenty of rocks around to allow us to leave our old walls, with their beautiful patina, in place. Once you’ve determined it is o.k. to dig up your rocks, you will need to take steps to protect them. That’s right, protect the rocks. Shovels and excavators will scar rocks, often leaving un-attractive white gashes. Rocks removed with excavators should be dug out, hoisted out with straps. If they do get scarred, rubbing dark top soil into the gash can disguise the mark and help it to regain its patina. The project shown above started with a few stones from the garden, and the we brought in more locally sourced granite slabs for a natural stepping stone walkway. 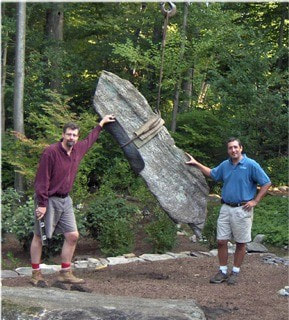 Simply placing stones along a slope and planting a rock garden is a functional and beautiful use for the stone found in your landscape. Rocks correctly placed can hold soil and prevent soil erosion, allowing you to plant on otherwise too steep a slope. We have even used stones we’ve found to build a bridge. It’s great fun to walk over the stone bridge. And, unlike a wooden bridge no need to worry that it will wash down stream. These projects require very little cutting of stone. For walkways, patios and steps hiring a professional can ensure a safe and comfortable walking surface. Our mason’s chip and cut stone to ensure they are level and relatively smooth, to prevent tripping. We’ve even made stones fly! This stone was on the wrong side of the house, so we used a crane to lift it up and set it down into a contemporary Asian themed garden. Use your imagination, create something with your best crop! Learn more about Planting your Rock Garden The Guide to Growing Strawberries in your Garden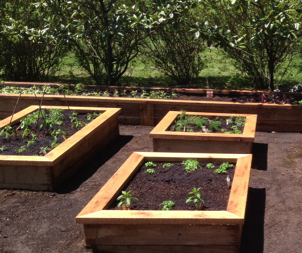 Just last night I picked our first crop of strawberries from the raised beds. The blueberry bushes in the edible garden are almost ready for harvest. June and July are berry time around here. This is the first of two articles on berries for the Connecticut garden. Strawberries are our first topic, followed by an upcoming article on growing blueberries. Strawberries, the ones I picked last night are ‘Seascape’ variety. We’ve planted other varieties, but have been most pleased with this one. Strawberries suffer from many fungal diseases, ‘Seascape’ is remarkably resistant to these problems. The plants produce large berries ALL SEASON, starting in June and producing a light crop in mid-summer, and another heavy crop in September. Most strawberries are done by July, so you can see why this one has become a favorite. Planting strawberries in raised beds with compost enhanced soils will bring you success. If the soil or compost you are using is heavy, meaning it is dark and dense and holds water very well, you should add sand to the mix. Strawberries prefer a sandy loam soil, which water drains from quickly. Clay soils are not a good site for strawberry production. Raised beds are often made from cedar or other non-treated woods. Do not use pressure treated wood to create a raised bed for food production. At our garden we’ve used locally sourced black locust boards to create our raised beds. For many of our clients, we have purchased raised beds from www.naturalyards.com, and have been very pleased with quality and price of these products. We have also used steel edging and Belgium block stones to create raised beds in our gardens. We use chopped hay for mulch, commonly used when establishing new lawns. This hay mulch is not be confused with hay bales, if you use hay bales (horse food), you will end up with a great crop of hay! Hay mulch is sold in a plastic wrapped bale, it is weed and disease free. This mulch prevents fungal diseases in edible crops as it is naturally inhospitable to fungal growth. It also keeps the strawberries clean and free from sandy grit. Harvesting your strawberries daily is important, if left on the plant when ripe, birds, rodents and our dog will eat them! It is also important to remove any rotting berries, or brown leaves, as this will cause fungal diseases to spread. Do not compost strawberry waste. Strawberry plants are not easy to find in local nurseries, we purchased ours from the Burpee Seed Catalog online store at, www.burpee.com. They shipped us our plants, we followed the planting instructions in the package, and have been very pleased with the results. Where to plant? Full sun, well drained (no puddles), preferably in a raised bed When to plant? Order in February or March. Plant in Mid-May, can be planted up until September. If summer planting watering is critical. How far apart to plant? 2’apart. Strawberry plants create runners by the second year, these are new plants that reach out as a stem, touch the soil and form roots. The bed you plant them in should be big enough to allow for spreading. Divide them in the third year. Mulch? Yes, chopped hay mulch as described above is good, or other organic, non-dyed mulch will do. Do not use raw wood chips as mulch on fruit and vegetable plants. Water? Strawberries are sensitive to excessive water and dry spells. A raised bed will solve the drainage problem. If it is dry, water in the morning, do your best to water the soil and keep the leaves of the plant as dry as possible. Watering between rows works well. Avoid watering at night as leaved do not dry out quickly and fungus problems can occur. Fertilize? They prefer a pH of 6.0 to 6.3. Apply lime to the soil in February, especially if planted in a raised bed. As ‘Seascape’ produces berries spring to fall they need to be fertilized. We use Espoma Organic Garden-Tone in March and again in June. Read the package directions and follow them. Pests? Tarnished plant bug, slugs, rodents, dogs. Insects are not a big problem with strawberries, fungal diseases are the primary problem. Planting ‘Seascape’ or other disease resistant plants and keeping the beds clean of rotten berries and brown leaves is the best prevention. Extras? Plant at least 12 plants for a good harvest. The berries don’t freeze well, but they do make a wonderful jam or pie, or short cake… yum. Find out more about Planting Strawberries in Your Garden Years ago we planted one blue berry shrub, and were disappointed year after year with no berries. What was wrong? Part of my studies for my certificate in horticulture included fruit production, the light dawned, we needed more than one variety of blueberry! The cross pollination between the varieties produces the flower and berry. Some blueberry varieties are self-pollinating, but all will produce more with other varieties nearby. We planted high bush varieties and have been very happy with ‘Duke’ an early producer which grows to about 5’ high and wide. ‘Blueray’ is a mid-season producer of very sweet berries, it is a bit taller at 6’. Two smaller varieties we have been pleased with are, ‘Herbert’ and ‘Northland’. ‘Herbert’ grows to 4’ high and 5’ wide and is a late season producer. ‘Northland’ is 4’ x 4’, mid-season producer, a cross between a high and low bush shrub. Selecting shrubs for early, mid and late season production will extend the period of time the shrubs produce berries, thus extending the time we have fresh berries to eat. At a clients home we planted a hedge of a low bush variety called ‘Top Hat’. These shrubs grow only 18” high, we replaced a tired boxwood hedge with these beauties. Best part, the blueberries were toddler height, to the delight of the families youngest member. The difference between high bush and low bush varieties is size and in some varieties taste. High bush tend to be sweeter. Low bush berries are more tart, with intense blueberry flavor. What to plant? High bush, V. corymbosum, or low bush, V. angustifolium varieties. Bare root, or a shrub? Bare root are exactly what they sound like, a root with a leaf or two on it. These are inexpensive and easier to plant, but they have a high failure rate, and you will wait 3-4 years for a harvest. Shrubs are more expensive, they are much older plants, and are ready to produce a small crop the first year. Blueberry shrubs can be purchased a local nurseries and can be planted spring through fall. Where to plant? Full sun area, with moist soils. When to plant? If planting a shrub in a plastic container, plant March to November. If planting bare root, or a ball and burlap prepared plant, plant in early spring, Mid-March through May. How far apart to plant? Average high bush blue berries should be planted 4’ to 5’ apart. Low bush 2’ to 3’ apart. Mulch? Yes mulch the shrubs. Do not use raw woodchips or dyed mulch. Natural un-treated mulches are best. Fertilize? Yes, one product we have used and liked is Espoma Organic Soil Acidifier, ammonium sulfate will also do. Apply when planting according to package directions, in following years apply in early March. Pests? Birds, you must either get up very early and check your blueberries for ripeness every day, and be prepared to pick them, or the birds will beat you to it every time. Bird netting is a better option, put the net on when the berries form, keep it on until they turn blue and are ready to eat. Now, this is important, you must check bird netting every evening as birds can get caught under the netting and die. Bird netting can be purchased at nursery’s, farm supply stores and hardware stores. You can remove the netting once you have finished harvesting berries. Blueberries are not often harmed by insect or fungal diseases, reducing the need for pesticides and fungicides. Extras? Blueberries are attractive shrubs all summer with brilliant red or orange foliage in the fall. No need to plant them out of sight. Get help planting your strawberries! Visit Beautiful Gardens Close to Ridgefield, ConnecticutThe best way to improve your garden is to visit other gardens. Expand your gardening horizons with a day trip or a stop while on vacation. Great gardens open your eyes to new worlds of plants, design, art and history. Over the years we have met great friends and met many local gardeners while touring. We’ve heard stories of world travels and gardens visited from Italy to India. Many gardens include tours of houses, structures, home decor and art of great beauty. Here are a few of my favorite spots. Stone Crop Garden in New York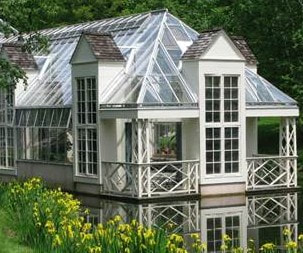 If you are travelling with companions who are not that “into” gardening, Stone Crop is a good choice for a day trip. Its landscape design includes views from its 1,100 perch in the Hudson Highlands, delicate structures, rocky walks, alpine slopes and brooks that run down to ponds and gazebos. Those guests just along for a good walk, will be just as delighted as those wanting to know the name of every plant along the way. The garden is approximately 12 acres, you will be constantly surprised as you walk the garden paths. There are many areas of interest, a pavilion, a glass conservatory, gravel garden, alpines, pond gardens, woodland shade gardens and most interesting to the student of gardening, systematic order beds. These beds contain plants representing over 50 plant families, they are a great way to study, and learn plant names quickly. Rare seeds are available for sale. For those looking for an education in horticulture the garden offers intensive internships for serious students of all ages. Some of the gardens are located on steep slopes, wear outdoor shoes. Allow for at least two hours to explore the garden. Garden Information 81 Stonecrop Lane Cold Spring, NY 10516 Phone (845) 265-2000 Visit the website for detailed information: www.stonecrop.org Open days are Monday through Saturday, from 10am to 5pm. Admission is $5.00 per person for a self-guided tour Hollister House Garden in Litchfield, CTHollister House Garden a charming classic English garden set around a Connecticut house dating from the 1760’s. This garden has been featured on the Martha Stewart show, and is well worth the hour or less drive up I84 into the Litchfield Hills. The heart of the garden is the walled garden with a quiet reflecting pool. The plants in this area are a succession of blooms from spring to autumn. The Grey Garden is a formal parterre with views of the property and hills in the distance all surround by a babbling brook. Allow at least an hour to explore. Be sure to visit the website as this garden offers many interesting special events. Garden Information 294 Nettleton Hollow Road, Litchfield, CT www.hollisterhousegarden.org June through August, 8 – 10 AM and 3 – 6 PM September, 10 AM – noon and 2 – 5 PM Phone (860) 868-2200 Fee $5/person. Chanticleer Garden (way outside of Fairfield County)Chanticleer Garden the most creative public garden on the east coast in my opinion, and that of many of our gardening and landscape design friends. It is of a scale that is translatable to the home gardener. You walk away from Chanticleer talking to yourself, thinking “I can do that”. It inspires you to go home and explore your creativity in the garden. It is a harmonious, gem of a garden tucked away not far from Philadelphia. A trip to Chanticleer is easily combined with visits to two other well known gardens, Longwood Gardens and Winterthur. Longwood Gardens in Kennett Square, PA, is a huge, showy public garden with massive fountains, glass houses, and firework shows. Winterthur, 5105 Kennett Pike, Wilmington, DE 19807 is a 60 acre naturalist woodland garden and museum house. All three gardens are within a 45 minute drive from one another. The Ruin Garden is fascinating, surprising, a little shocking and a bit scary, not words you usually associate with gardens. The cut flower and vegetable garden is reminiscent of Giverny, Monet’s garden in France. The Tea Cup Garden and Chanticleer House garden are overflowing with tropical’s, fountains and espaliers. The Serpentine garden, is a delightful stroll. Cool off in Minder Woods and as you walk by the Pond Garden. Allow at least two hours to tour the gardens. Garden Information Chanticleer Garden www. ChanticleerGarden.org 786 Church Road, Wayne, PA 19087 (610) 687-4163 Open Wednesday through Sunday from 10 am until 5pm. The garden is also open on Friday evenings until 8:00 p.m. from May through Labor Day. Fee $10 Chanticleer is approximately a three hour drive from Connecticut. Learn more about Gardens in Connecticut Coastal Main Garden (4 1/2 Hours from Connecticut)Coastal Maine Botanical Gardens is a 250 acre botanical garden in Boothbay Maine with costal views, sculptures, a delightful children’s garden and a garden for the five senses. Get out of the car on a long trip to Maine and walk the long gravel paths that descend from the Burpee kitchen garden and the children’s garden down to the shore. The children’s garden has a delightful fairy house village. The garden has a permanent collection of sculpture including the not to be missed, chiseled glass orb by Henry Richardson and the Three Spraying Whales by Carole Hanson – in the Children’s Garden. The garden is set atop a steep slope, visitors walk down wide paths to the water where a shuttle bus waits to drive you back up to the visitor’s center at the top of the hill.
After you have enjoyed the shopping in Freeport and the lobster rolls and whale watches in Boothbay, enjoy Maine’s nature at its best at one of the newest botanical gardens on the east coast. Allow at least two hours to visit. Garden Information Free docent-led tours are offered at 11:00 a.m. and 1:00 p.m. every Thursday and Saturday from June 1 until Columbus Day weekend. Pets are welcome at the garden, with a special Dog Walking Trail, water spigots and dishes and a deeply shaded parking area. Located just off route 1, it is a 4 ½ hour drive from Connecticut. Boothbay is a 45 minute drive north of Freeport and three hours south of Bar Harbor. 132 Botanical Gardens Drive (or 200 Barters Island Road), Boothbay ME 04537 Open daily from 9:00 a.m. – 5:00 p.m. year-round. Fee $12/person. Your Guide to filling Blank Spots in Your Yard with the Pagoda Dogwood, Eastern Red Bud and Service Berry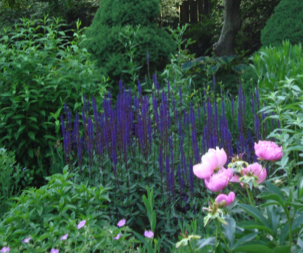 After hurricanes Irene and Sandy not to mention the ‘arbor-geddon’ of the October snow storm. We found we had great blank spots in the gardens of Newtown, Ridgefield, Wilton and many other Connecticut towns. It was May after Sandy, and the arborists were still at work taking down trees and picking up branches. With the old trees gone we were left with the question, ‘What to put in that blank spot?’ Going to the nursery to select new trees can be overwhelming, there are so many choices. We tend to fall back on the trees we know, the weeping cherry or the flowering pear. Past year’s storms have taught us a few things about the characteristics of trees we want on our properties. Trees with weak wood or branch arrangements such as the flowering pear and weeping cherry can be destroyed in storms. Large trees can cause serious damage when they fall or lose large branches. If planting near your home or power lines smaller trees are a good choice. We still want trees with showy flowers in the spring; several good choices are the Dogwoods, Eastern Red Bud or Service Berry trees all are fine native trees. The Pagoda Dogwood, Cornus alternifolia, unlike the more common Florida Dogwood, has healthy foliage. It is not susceptible to a fungal disease, anthracnose, that plaques the Florida Dogwood. The Eastern Red Bud, Cercis canadensis, with its bright pink flowers and heart shaped leaves is an super choice for a front of the house tree. The variety or cultivar ‘Forest Pansy’ has burgundy colored leaves for good foliage color all season. The Service Berry, Amelanchier arborea, has white flowers in spring, and berries for the birds in June, followed by excellent fall color. These three trees grow to only 25’ in height, perfect for that ‘blank spot’. For even smaller trees for tight spaces, or to fill those blank spots in front of larger trees try these three. How many trees in your garden flower in February? The Witch Hazel does. Hamamelis vernalis, has a bright yellow, fragrant flower on a lovely small tree, grows to 15’ high. It even blooms when snow is on the ground. How about a summer flowering tree, when the show is over in spring look forward to seeing the American Snowbell in flower. Sytrax americanus, is only 15’ high and 10’ wide, with bell shaped white flowers, blooming in summer with berries in fall. Speaking of berries, Nannyberry, Viburnum Lentago has a white flower, which turns into pink, blue and black berries in the fall. It grows to about 20’ and has multiple trunks. to fill in those blank spots is right now, spring is an excellent time to plant these trees as is fall when the weather turns cooler and we have reliable rain. Make sure you water your new trees throughout the summer and into the fall. They’ll reward you next spring when you are no longer looking at those blank spots. Contact an Arborist in Ridgefield, CT Learn more about the Planting Your Pagoda Dogwood Your Guide to Planning a New Landscape GardenAs Old Man Winter loosens his grip and the snow begins to melt away, we draw our attention to the landscapes that enhance our homes and lives, and increase our property values. If you are creating a new garden or just renovating an existing garden, understand that planning is a crucial part of the process.
The first step is deciding the function of the garden. What do you want to accomplish? Is it to attract wildlife, provide screening, or perhaps to create a quiet place to sit and contemplate? Next, decide where to locate it. Perform a site analysis. What is the soil in the area like? Is it dry, wet, sandy, loamy? Have a comprehensive soil test done to determine if the soil needs to be amended. What sunlight will it receive as the seasons change? Will the garden be protected from winter winds or shaded from the hot summer sun? Once you have determined the site conditions you can begin to choose plants that will be appropriate for the soil type and climate. The Northeast Organic Farming Association (NOFA) advocates the “Right Plant in the Right Place”. By placing the right plants in the optimum conditions, it will reduce the amount of maintenance, watering, fertilization, and insect and disease damage. Be sure to utilize native trees, shrubs, perennials, and grasses suited for the climate. Garden2By following some of these simple steps you can create a garden that will thrive and be aesthetically pleasing for years to come. Chris Baliko is Co-Owner of Growing Solutions, LLC and is accredited by the Northeast Organic Farming Association and a CT licensed arborist. For more information about Growing Solutions’ organic landscape design and lawn care services call (203) 403-6552 Learn more about Planning a New Landscape Garden Contact our CT Licensed Arborist We present - Our Interview with Natural Awakenings An Interview with Chris Baliko of Growing Solutions Tell us a little bit about your company and its foundation. Growing Solutions, LLC is a full service landscape company servicing Fairfield County since 2002. It is co-owned by Paul Fujitani and Chris Baliko. We began questioning some of the conventional practices and uses of chemicals in the landscape. In an effort to provide safer environments for our clients, our employees, and ourselves, we became Accredited Organic Land Care Professionals in 2006 and provide organic services such as sustainable landscape design, organic lawn and plant health care programs, and organic tick control. What are some of the services your company provides? We offer landscape design/installation, organic lawn and plant care, masonry, complete property maintenance, large tree care, and irrigation & lighting services. What are some common landscaping/gardening practices you can think of, off the top of your head, that are harmful to the environment and how? The common landscaping/gardening practices that are detrimental to the environment are the use and overuse of synthetic fertilizers and chemicals. Healthy soil is full of beneficial microbes- bacteria, fungi, and nematodes, all of which help make up the soil food web. They help break down the organic matter in the soil which releases nutrients into a form that is available to the lawn or plants. When synthetics are applied to the soil, they tend to kill off these microorganisms. As these microbes are reduced in the soil, the organic matter is not broken down as efficiently, thus reducing the nutrients available to the plants. It is then up to us to apply more fertilizer. As we apply more fertilizer we kill more microbes. This cycle continues until we end up with a ‘dead soil’. What we as landscapers and gardeners need to understand is that our focus should be on having a healthy soil. If we have a healthy soil, generally, you will have healthy plants. Another issue with applying more fertilizers is that much of it ends up as runoff and pollutes our waterways. Location, Location, Location! So many times we see plants struggling to survive simply because they are in the wrong spot- it’s too sunny, or shady, or there is not enough drainage, or it’s too dry. What do you suggest in order to make these practices more eco-friendly? Before applying any fertilizer, a soil test should be taken and the results analyzed to determine what the soil needs are. Take steps to amend the soil with compost which is full of beneficial microbes. Use organic fertilizers that have lower levels of nutrients and are broken down by the soil biology at a slower rate, thus releasing these nutrients over a longer period of time, which also reduces runoff issues. Right Plant, Right Place. Be sure to research a plant’s needs and optimum growing environment. They will be healthier and less susceptible to insect damage. They will also need less fertilizer and watering, which means overall, the maintenance is lower. What is the first thing you do when attempting to make a landscape more eco-friendly? The first step to making landscapes more eco-friendly is to study the soil. A soil test should be taken to determine what amendments need to be added to improve the soil. This is the basic building block to having a thick, healthy lawn or a garden that thrives. Why should someone pursue organic lawncare? Is it more expensive? Homeowners should pursue organic lawn care so they can create healthier environments for their families and pets, to reduce the runoff of chemicals and synthetic fertilizers into our waterways, and reduce their overall maintenance of their landscape. Typically, an organic lawn care program is requires more of an initial investment, but over time the cost tends to decrease once the soil biology has been built up and the need for fertilizer and water decreases. Do you have any interesting statistics about the environment when it comes to landscaping and gardening? There are over 40 million acres of turf in the United States and we use over 3 million tons of fertilizer and 30 thousand tons of synthetic pesticides each year to help maintain it. Homeowners can reduce the amount of fertilizer applied to their lawns by 50% by simply leaving the lawn clippings and allowing the microbes in the soil to break them down. Any other tips you can offer to someone who is looking to make their lawn or garden more eco-friendly? Some additional tips would be to think of your landscape as an eco-system. Encourage more native plant species on your property, be aware of invasive plants and animals and remove them if possible, and preserve existing plants that attract native fauna and beneficial insects, such as butterflies and lady bugs. Learn more about Organic Lawn Care Contact our Landscaping Company |

 RSS Feed